Showing posts with label recipes. Show all posts

Monday, October 21, 2013

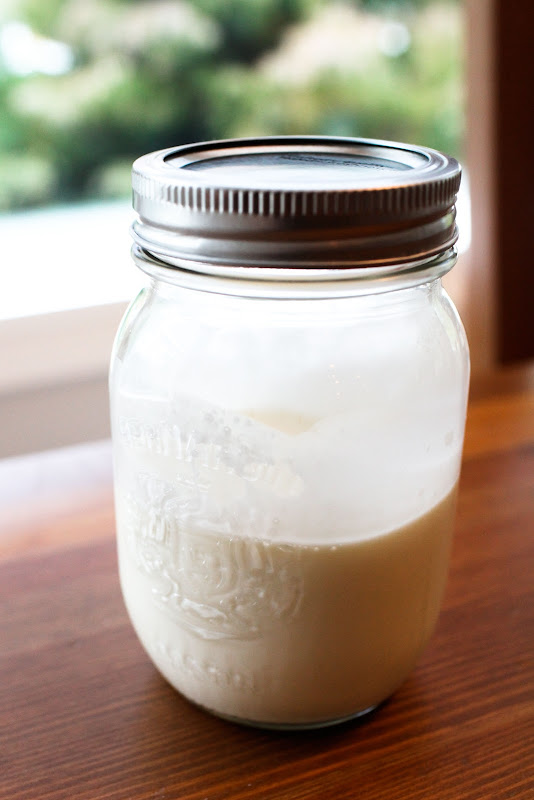
Raw Plum Yum Jam


I know I already instagrammed this but I had to write this easy and super healthy recipe on the blog because it was really so yummy! To make this raw jam you'll need some always magical chia seeds which use their superfood super powers to turn things into thick and goopy jelly-goodness! For the fruity bit you could use strawberries, blueberries, peaches or any fruity thing you like I suppose. I used plums because I had so many left over from my last couple of farm boxes. I used about 6 or 7 good sized chopped raw plums and about 3 tablespoons of chia seeds, this made me enough jam to fill a small jar. Stick this into your blender with a nice dollop of honey. I used a heaped tablespoon of my favourite raw local honey but you can make it as sweet as you like! If the fruit you are using isn't as juicy as plums you could add a tablespoon or so of water to the mix just to help the chia seeds gelatify (that's probably not a word but you know what I mean). Blend until you get the consistency you like, pour into a lidded jar and chill before serving. You should end up with a delicious jam with a nice, gooey, jammy consistency full of raw fruit and chia goodness. It'll be full of fibre and omega 3 fatty acids, it'll will boost your energy, aid digestion, give you lovely glowing skin and just taste yummy. 
 Your jar of goodness should keep in the fridge for about 5 days. 

Friday, September 13, 2013

Wheat Free Banana Bread with Cashew Cream


I've been looking for ideas for things I can bake to go in Seb's Lunch box. I want to make sure he gets a nice filling, sweet treat every now and again but don't always want to send him off with conventional baked goods full of processed sugar and flour. Here's a recipe I came up with last week for a modified Banana bread that I can officially call a resounding success! I used brown rice flour and spelt flour instead of processed white flour. Coconut Oil instead of butter and coconut palm sugar instead of processed white sugar. I baked it last Thursday and it stayed moist and yummy in a sealed container for almost a week with a slice a day going off to school with Seb.  Result! 
I would have added walnuts or pecans but at the time I wasn't sure if there were any nut allergies in Seb's class so I left them out. I've since found out there are no allergies to worry about so I will definitely add them in next time. 
I made some cashew cream to top it off and enjoyed the odd slice myself with a bit of chopped banana and a wee sprinkle off bee pollen. Lovely with a cup of tea in the afternoon!

Banana Bread Ingredients


  • 1 cup boiling water
  • 1/2 cup dates (chopped)
  • large eggs
  • 2 cups bananas (mashed, very ripe, about 4)
  • 3/4 cup Coconut palm sugar
  • 1/2 cup unsweetened applesauce
  • 1 tsp vanilla extract
  • 11/2 cups brown rice flour
  • 1/2 cup Spelt flour
  • 1 tsp baking soda
  • 1/2 tsp salt
  • 1/4 tsp ground nutmeg
  • 1/3 cup Coconut oil (melted)
  • 1/2 cup chopped walnuts

  1. 1. Preheat oven to 350°. Pour 1 cup boiling water over dates in a small bowl. Let stand 10 minutes. Drain and pat dry.
  2. 2. Lightly beat eggs with a whisk in a large bowl. Whisk in bananas and next 3 ingredients until blended.
  3. 3. Stir together brown rice flour and next 4 ingredients in a small bowl. Gently stir flour mixture into egg mixture, stirring just until blended. Gently stir in melted coconut oil, walnuts, and dates. Spoon mixture into a lightly greased 9 x 5 inch loaf pan.
  4. 4. Bake at 350° for 1 hour to 1 hour and 10 minutes or until a wooden pick inserted in center comes out clean. Cool in pan on a wire rack 10 minutes. Remove from pan to wire rack, and cool completely (about 1 hour).

Cashew Cream Ingredients


1 cup of raw cashews 

1/2 – 3/4 cup of filtered water (add more water according to consistency desired)

2-4 Tbsp. honey or pure maple syrup
1/2 teaspoon vanilla extract

Directions:

1.  Soak the cashews in filtered water for 3 hrs or more then strain.

2.   Add the cashews and fresh filtered water to the blender or food processor and blend until smooth.

3.   Add remaining ingredients then blend until smooth.


Sunday, June 10, 2012

Power balls! Ka-pow!...

.....Or as I prefer to call them prune balls, I just think it sounds less pretentious don't you? :)


So I whipped these babies up yesterday with a batch of nut pulp left over from my nut milk. I'm afraid to say that nine times out of ten my nut pulp goes into the bin (or at least now the compost bin)  because I really haven't found a recipe that I'm likely to be bothered to produce everyday with my leftover pulp....until now that is! And this one I made up myself, Wooo! It was loosely based on an energy ball I tried at a really cool place in Nanaimo called Power House Living Foods, It's an entirely raw food cafe and for the five minutes that I was in there I was in heaven! If you have a mo check out their menu, it's mouthwateringly good and entirely raw. Anyway, I'm not sure exactly what was in their delicious power balls but mine are made with soaked almond pulp (from about 1 cup of blended almonds), 4 or five prunes ( but you could use medjool dates, figs or the like), a drizzle of raw honey and 1 1/2 tablespoons of coconut oil. Just process the pulp, honey and prunes into a nice fine chop then add the coconut oil and whizz for another minute or so to mix the oil into the mixture. Take small pinches of the mix and roll in the palm of your hand to form a ball. You can leave the balls naked or roll them in anything you fancy. I rolled some of mine in raw cacao (holy yummy balls batman!), some in sesame seeds, some in matcha powder and a couple in crushed up millet cereal (they didn't stick around long enough to be in the photo above). All were delicious but for me it's a tie between the sesame seeds and the raw cacao. Pop them in the fridge and they'll be nicely chilled and ready to eat in about 20 minutes. They make a satisfying and full of goodness treat for those of you with the curse of the sweet tooth like me. Keep them in the fridge and they'll last for 4 or 5 days ( or in my case, 4 hours before they're all eaten up!)
Give it a whirl why don't ya!

Sunday, March 25, 2012

Nori salad...Num Num!

Sea veggies are great! Yes, they are. Sea vegetables like Nori and Kelp are full of minerals and iodine so they help regulate our metabolism and feed our thyroid. Nori is also chock full of vitamin A, B and C not to mention calcium and niacin. In other words it'll help keep your heart, your bones and your skin healthy and boost your energy levels too, Sheesh!
Nori comes in dry sheets that are most commonly used in sushi rolls but they can be used in tons of other ways too. It's usually toasted but if you can try to buy raw Nori sheets these, like most raw foods, pack more of a nutritional punch. I used them here in a salad where they moisten up nicely when mixed in with the dressing and add a good chewy texture and interesting flavour.  


Nori, Pear and Cashew Salad with Malple Vinaigrette, Terriyaki(ish) chicken and Quinoa.

This was our dinner a couple of nights ago and to be honest it was a last minute hotch-potch kind of dinner but OH MY it turned out scrummy! I'm quite proud because I came up with this combo entirely by myself without a sniff of inspiration except from inside my own head.

You Need:

2 Chicken Breasts (free range organic)
Honey
Tamari
1 clove of garlic, crushed
2 green/spring onions
A couple of good handfuls of leafy spring mix
1 large handful fresh cilantro (fresh corinader if your English :)
1/2 a large pear, chopped into small chunks
1 and a half nori sheets, cut into thin strips
I small handful cashews, chopped.
Olive oil
Apple cider vinegar
maple syrop
1 cup of Quinoa
salt and pepper to season

- Thoroughly rinse your Quinoa in a sieve then add to a sauce pan with 1 1/2 cups of water.

- While your Qunioa is coming to a boil chop the chicken into 1/2 inch thick strips and drop into a pan with a good size glug of hot oil. Sear all sides of the chicken.

 - Squeeze your garlic clove through a crusher and add to the pan with the chicken, stir in and then turn the heat down to low.

- Add a couple of table spoons of Tamari and one tablespoon of honey. Stir into the chicken and leave to bubble away at a low heat stirring now and then.

- As soon as your Qunioa reaches a boil, turn the heat down to medium/low and cover the pan with a lid. Allow to simmer for 15 minutes.

- Wash your spring mix and cilantro, chop roughly and toss together in a large bowl.

- Add 2 -3 tablespoonfuls of olive oil, 2 tablespoons of apple cider vinager and 1 tablespoon of maple syrop to the salad.

- Add your chopped Nori sheets to the salad and toss it all together. Season to taste.

- Keep checking on your chicken and stirring occasionally. The sauce should be reducing down and it should be bubbling away into sticky, golden goodness but if it's starting to look too dry take it off the heat.

- Your chicken should be done at exactly the same time as your Quinoa which should be light and fluffy after 15 minutes.

- Time to plate! Sprinkle your chicken with the chopped green/spring Onions and sprinkle the salad with the chopped cashews.

Voila!


Friday, March 09, 2012

Life in March...


I've been feeling a bit overwhelmed by the staggering amount of photos I need to blog from our trip to England. I keep looking at them all and mentally trying to compose posts and think about which pictures I will bunch together or whether or not to pop them all into a slide show but it's just too much for my little brain to organize so instead I give you......the last few days.....


We're back in Tofino. Sully is happy but that's nothing new. We've had some beautiful sunshine and some lovely rainforesty rain. Weirdly I missed the rain while we were away. I actually like it when it's bucketing down especially when I'm snuggled into my bed listening to the downpour outside my window. Soothing :) Anyway, we've been here a whole year now and I can't quite believe that. I'm excited that the hummingbirds and the gray whales are all on their way back and hope to see lots of both in the next few weeks.  I'm also looking forward to the sprouting of the swamp lanterns, I'll get a photo for you as soon as I see one.


On the subject of sprouting I was pretty excited to see that my long dead rhubarb (a pressie from my Mummy last spring) seems to have miraculously come back to life. Maybe it's not so miraculous, maybe I just don't know a lot about rhubarb, but I'm happy either way.
The sprouting of the rhubarb inspired us to do a little gardening. The kids helped me pull some weeds mostly because they had earlier in the day persuaded me to buy them each a pair of gardening gloves.


We continued with our green fingeredness indoors and have begun the process of sprouting some seeds . With a bit of luck we'll be producing some nice crisp sprouts for our sandwiches sometime in the next couple of days.


So far we have only got to the soaking stage of sprouting and I'm amazed at the level of excitement aroused by basically tipping some seeds into a jar of water. I can't wait to see the kids faces when (if?) these things actually grow.
Each of their sprouting jars has been marked with a coloured ribbon and is being guarded by a specially selected sprout protector as seen below. 


In other news, Belly had a day of sudden and mysterious illness, always horrible and a bit scary. My poor little monkeypants spent the morning puking and sleeping and I've no idea where or how she picked up a bug.
Yes, she almost always sleeps with her eyes open, sometimes much more open than this...


My action plan was...get some greens into the girl! Spinach, spinach and more spinach! (We happened to have a lot of spinach in our fridge that day). I made a spinach and cashew pesto, yum and easy peasy! I just whizzed up a big bunch of fresh spinach with a handful of raw cashews, a big squeeze of lemon, some olive oil and salt and pepper to taste. It was GREEN! And green = healthy. I mixed it into some pasta and told the kids it was special Hulk pasta, Seb wasn't fooled but was forced to eat it anyway. Belly, who is generally much more open to green things, wolfed it down. Good girl.


I also cunningly whizzed up some spinach in a smoothy. Now this is a trick you MUST try if you have kids who are picky with their veg. 2 cups of fresh spinach, 2 cups of delicious fruit of your choice and 2 cups of water. Depending on the fruit you choose and it's natural sweetness you could add just a dash of maple syrup to sweeten. Anyway, the smoothy this creates is so fresh and energising it makes a really extra good breakfast. I love it and so did the kiddies. Score!!!


Thankfully Bel's mystery bug disapeared as quickly as it arrived and she seems to be back to her normal energetic self. To celebrate her healthyness, today we ate chocolalte :) 


I was driven by a sudden and overwhelming desire to make chocolate crispy cakes! I used nice 80% cocoa solids cha-loc-a-lat and a spoonful of coconut butter (oh-my-god-that-stuff-is-sooo-good!), not to be confused with coconut oil, coconut butter contains some coconut meat as well as oil and has a creamy consistency similar to thick peanut butter, it's so yum. The resulting crispy cakes were nothing short of perfect and we made another batch as soon as Neil got home :)


This is Sully's jealous face....


 Being a dog he isn't allowed cha-loc-a-lat and this upsets him :( so he went off and pretended to be a kitchen rug.


Monday, January 16, 2012

Make butter and better choices.....because you can!


One of my resolutions for the new year is to eat well. Let me explain (hopefully without boring you to tears).... For the first two weeks of January Neil and I went vegetarian. Anyone that knows Neil will be in utter shock that he could last two weeks without meat of any sort. It's not that we don't want to eat meat we just wanted to teach ourselves that meat does not have to be a daily part of our diet. From now on we'll be much more selective about the meat we buy. As we'll be eating it less often we'll be able to spend a little more on the quality. We'll be aiming for meat that is as local as possible, organic and high welfare or no meat at all. We've already figured out the huge benefits of having a crab pot and a freezer full of fish we caught (thanks to my dear brother Dan taking Neil fishing!) And just for the record, Mcdonalds is OFF the menu! FOREVER! :) You'll have probably noticed that I've been leaning towards coconut oil and nut milk instead of dairy but again, that doesn't mean no dairy at all. We've discovered that making our own butter is actually more cost effective than buying butter in the supermarket. In our part of the world organic butter is much more expensive than organic cream. So we go and buy some organic heavy cream and turn it into lovely organic butter! For all of those of you thinking "what a load of hassle, I'd rather just buy it" pleeeease read on and pleeeeeease try making your own butter just once, it's so flippin easy you'll be gobsmacked!

Here we go.....


Step 1- Take your cream out of the fridge and leave it to stand for about 30 minutes so that it reaches room temperature. If you don't do this step it's going to take you a lot, LOT longer to make your butter.

Step 2 - Take a large jar, as large as you can comfortably hold in one hand. Fill it just about half way with your heavy cream.

Step 3 - Shake, shake and shake some more. Shake it all about so that the cream is swooshing around from top to bottom of the jar.


Step 4 - Keep shaking. Don't stop. At some point the sensation will change and the swooshing sound will stop. At this point you have made whipped cream. Keep shaking!!!

Step 5 - Keep shaking. all of a sudden the sensation will change again, you'll begin to feel a slopping sound as if you have a solid lump in thin liquid thumping the top and bottom of the jar as you shake.  You have officially made butter!! Stop shaking.


Step 6 - Open the jar and carefully strain the liquid into a cup. This is buttermilk and you can use it in baking some scones or some other yummy thing or as a base for a creamy salad dressing.

Step 7 - Put some cold tap water into the jar with the solid buttery lump and swoosh it around. drain off this water and repeat a couple of times until the water runs clear.

Step 8 - Plop your buttery lump out onto a wooden board and press down on it with the back of a wooden spoon to squeeze out any remaining buttermilk. If you don't squeeze out the buttermilk it might make your butter go sour.  At this point you can decide to add salt or not. For this quantity I'd add about  1/4 teaspoon and mix it up with the butter in a bowl. 


Step 9 - Once you've squeezed away the rest of the buttermilk, use the wooden spoon to shape your butter into a block or any other fancy shape you might like. Wrap it in some grease proof paper and pop it into the fridge.

You just made butter! Woohooo!  All we need now is our very own cow.

:)


Wednesday, December 14, 2011

Scrummy Nut Butter....


Dear Santa,
Thankyou for getting me (and Neil) my brand new "candy apple red" food processor for Christmas this year. I'm sorry I opened it early but just think of all the wonderful, yummy nosh I can make now in all those days before Christmas really arrives. I made you some delicious hazelnut butter as a thank you gift but I'm afraid it was just so good I've eaten it all myself. I do promise I'll make some more and spread it thickly on your black bean cookies that I'll leave for you and the reindeers on Christmas eve. In the meantime here's the recipe in case you or Mrs Claus has time to whip some up...

Lots of love from your good friend Sophie


Take a big bag of hazelnuts ( already shelled if you are sensible, if, like me, you are not, spend the next hour cracking them all open) spread them across a baking sheet and place in the oven at about 300F for 15-20 minutes until the husks begin to crack. Set aside and allow to cool then rub your nuts (hehe) between a tea towel to remove the husks. Whizz up in a beautiful shiny new candy apple red (optional) food processor for 1 -2 minutes until the nuts are chopped into a fine powder. Scrape down your bowl then whizz for another 2 minutes or so until you have a lovely smooth butter. If you need your nut butter a little more spreadable add a spoonful of your favourite oil. I would suggest nothing with a strong flavour that will detract from the yummy hazelnuttyness.  I then added a tablespoon full of raw cacao because I'm a chocoholic. It's like Nutella only WAAAAY better! Yum!


While I made the nut butter Neil made a loaf of Bread.....Hell Yeah!!

Tuesday, December 06, 2011

Choco-Chai Christmas Cookies....


Here's another sweet and delicious recipe for all my fellow Chocoholics Anonymous friends. I hope you're ready because I'm about to blow your minds.............these cookies are gooey, choclatey, totally scrummy and.....MADE FROM BLACK BEANS!!!!! KAPOW!

Yes, black beans my friends. High in fiber, iron, folate, protein and antioxidants, great for your digestive tract, blood sugar regulation, cardiovascular health, health of your nervous system and (here comes a biggy.....) cancer prevention thanks to their 8 different flavonoids and enormous antioxidant potential. Beats the average lump of fat and sugar we usually call a cookie by a million miles!

Here's the how to.....

1 1/2 cups black beans, very soft (or 1 x 15oz can)
2 Tbsp coconut oil (or ghee)
1/3 cup organic cocoa powder
1/4 tsp coarse sea salt, plus some for sprinkles
contents of one chai teabag

1/3 cup maple syrup or honey or agave.
2 Tbsp ground flax seeds (or two eggs)
1tsp vanilla extract

1/3 cup chopped dark chocolate (80% cocoa or higher)
1/4 cup chopped hazelnuts


- Preheat oven to 375F. Line a baking sheet with parchment paper.

- Mix ground flax, maple syrup and vanilla in a bowl and set aside.

- Place well drained and well-rinsed beans, coconut oil, cocoa, salt and contents of chai teabag in a food processor and blend until well combined. Add maple syrup and flax mix and pulse to incorporate. Remove the blade from the food processor and add chopped chocolate and nuts. Fold to incorporate.

- Spoon cookie dough onto lined baking sheet. Use the back of the spoon to flatten the top of the cookies slightly as they will not spread when baking. Tip - make the cookies no larger than 2 1/2 to 3 inches across. Once cooked they'll be quite soft and larger cookies might break easily. Sprinkle with coarse sea salt and bake for 15-20 minutes or until edges are browning. Cool. EAT!!


This recipe was adapted form Sarah's stunning recipe for Chilli Chocolate cookie on My New Roots. I tried and loved the chilli cookies but Neil and the kids were not too keen on the funky chilli chocolate combo so my version is aimed at all those who prefer their cookies without a kick. 

Thursday, November 24, 2011

Kale Crisps.....I know they look freaky but they sure are tasty


I'm pretty sure just about everyone has already heard of and probably experimented with Kale chips but I'm good at jumping on bandwagons so I thought I'd give it a try too. I have recently become addicted to Kale and have been trying to entice the kiddies to get in on the act and share my love of this curly leafed nutritional wonder food. Unfortunately because it does not start with "Pas" and end with "ta" they are sceptical to say the least. My cunning tactic of turning it into a crunchy chip and calling it a snack worked with Neil, he has even gone so far as to request more. I call that success!
Kale crisps are ridiculously easy to make and can be seasoned in a billion different ways to suit your taste buds so there's no excuse not to experiment. No matter what you do to them they'll still be better for you than a-deep-fried-to-oblivion-piece-of-nothing-but-trans-fat-and-artificial-flavour-dust chip. Why is Kale so good for us?
Here's a little snippet of info from my favourite source of nosh inspiration My New Roots

"First of all, it packs more nutritional punch per calorie than almost any other food on the planet. Seriously. It is crazy-loaded with vitamin K, an essential vitamin for preventing bone fractures, postmenopausal bone loss, calcification of your arteries, and has even been shown to protect against liver and prostate cancer. And because kale is a member of the brassica family (think broccoli, cabbage, collards, and Brussels sprouts) it contains the organosulfur compounds that appear able to lessen the occurrence of a wide variety of cancers, including breast and ovarian cancers.Kale is also excellent source of vitamin A, vitamin C, vitamin B6 and manganese. It is also a very good source of dietary fiber, calcium, copper, vitamin B6, and potassium. This combination of vitamins, minerals, and phytonutrients makes kale a health superstar."


Well then. I don't think I have anything more to say other than EAT KALE!

I made a funky lime, soy and flax dressing for mine before baking but here's a simple recipe to which you can add whatever the heck kind of yummy flavouring you like!
1 bunch of Kale
1 tablespoon of olive oil
sea salt to taste

preheat oven to 300F. Rinse and dry kale then remove the stems and tough centre ribs. Cut into large pieces and toss with olive oil in a bowl. Sprinkle with salt then arrange in a single layer over a large baking sheet. Bake for 20 minutes or until crisp.
Leave to cool then tuck in!


Sunday, November 13, 2011

Scrummy simple spelt pancakes...


Holy moly these were good! Just looking at the picture is making me want more!!
Seb requested pancakes and Daddy wasn't home.  He's usually the go-to man for pancakes you see and is known to whip up a dozen with barely a second to think about it. He does make a particularly good pancake but he's a old school crepe man of the lemon and sugar club and I decided to go for the full on big fat and fluffy american style pancake mountain smothered in maple syrup and topped with a good heap of blueberries. It was breakfast heaven my friends and I was PROUD of myself!

I used Spelt flour, (more on the wonders of spelt here) which combined with a good heap of blueberries and a dash of maple syrup means these pancakes are feeding you all kinds of nutritional wonders as well as tasting just about as good as breakfast can taste.

Here's the recipe...make them today!

INGREDIENTS
2 cups of spelt flour
2 tbspn sugar
3/4 tspn salt
1tbspn baking powder
2 tbspn coconut oil (or butter) melted
1 3/4 cups milk or nut milk
1 tspn vanilla extract optional

METHOD
*Whisk together the spelt flour, sugar, baking powder and salt.
*Combine milk and melted coconut oil (or butter) and vanilla.
*Form a well in the flour, pour wet ingredients into dry. Stir the batter until just thoroughly moistened.
*let batter sit for 15 mins to thicken. 
*Heat a very lightly oiled skillet or heavy pan until a drop of water splutters across the surface then spoon in batter 1/4 cup full at a time. 
*When just beginning to set, flip and cook for about another minute. 

You will probably need to adjust the temperature of your pan to get it nice golden pancakes (my first two where blackened and didn't make the cut! Ooops.)

Oh and because Neil missed out he made me make them again for lunch....this time with bacon! Oh naughtiness!

Have good day folks!
x

Wednesday, November 09, 2011

No piggies were harmed in the making of this sandwich....


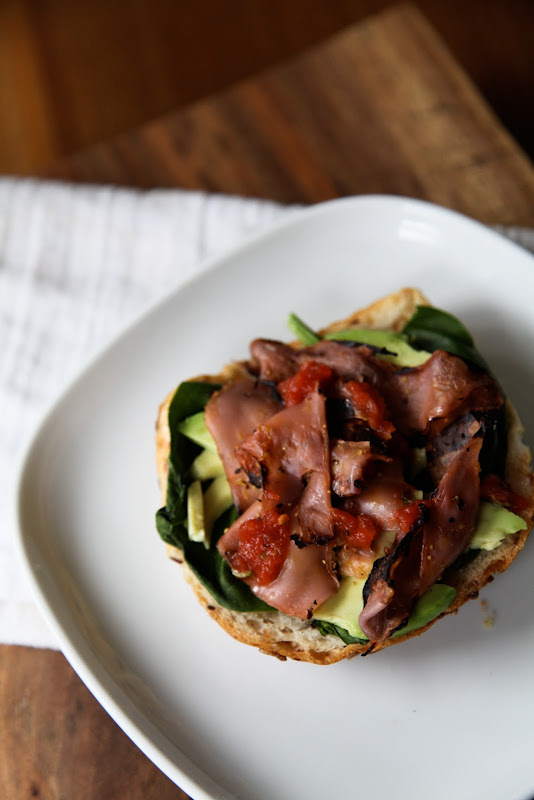
Just look at it, take a moment to absorb it in all its scrummy, sandwichy glory..... Mmm mmm..... Soft bread, fresh spinach, delicious avocado, zingy salsa and Bacon......
COCONUT BACON!!!
Yes, my friends, this is a meat free bacon sandwich and I'm as shocked as anybody. Who knew you could make bacon with baby coconuts? Not me. Not until Ani Phyo told me (thanks Kate!). I almost didn't believe her and when I came across a baby thai coconut in Tofino Coop (if you can find one here you can find one anywhere) I had to give it a whirl. I followed Ani's easy instructions on how to get into the coconut and how to extract the "bacon".  Then I had to improvise. Ani is a raw foodie and prepares her bacon in a dehydrator. I used the conventional bacon cooking method and stuck it under the grill with a bit of seasoning. As for the result, I was shocked! It crisped up on the edges and tasted meaty and a bit oily and delicious. Now if you're a real bacon lover this probably won't convert you to veganism forever but if you're interested in trying something new occasionally that could be a little better for you (and for the poor piggies) then give it a go. I highly recommend it!

Sending you all some piggy love!
x

Monday, November 07, 2011

What I like to do with nuts....


For the last couple of months I've been making my own nut milk most mornings. It's ridiculously easy and it's become a really enjoyable little ritual for me. I soak my nuts overnight then first thing in the morning, while the kids are eating their toast, I rinse my nuts, whizz them up in the blender with some water, then strain and squeeze. I usually add a drop of maple syrup or agave nectar into the blender to sweeten and sometimes add some raw cacao powder to make extra yummy chocolate milk. Raw cacao is a total superfood, it contains more antioxidants than blueberries or green tea and is one of the best sources of magnesium found in nature. It also has a subtle amount of caffeine, just what I need to get me buzzing in the morning!
I've tried a few different recipes for my nut milk and have modified these to find the one that I like best. 
1/2 cup of nuts, soaked overnight....I usually use almonds but anything goes. 
2 Tbspns of maple syrup or agave nectar.
5 cups of water.
Blend, blend, blend!
Some recipes leave the pulp in the milk for added fibre but I'm more partial to a smooth, milk-like texture so I strain the pulp out.  Just pour through a nut milk bag or cheesecloth then squeeze the pulp bag to get the last drops of nutty milk out. I use these old juice bottles and love that they look like glass milk bottles from the good old days! My milk keeps for up to four days in the fridge (but usually gets drunk within a day or two in this house.) Remember to give it a good shake before pouring. We've used nut milk in in everything you would usually use dairy milk......with cereal, in smoothies, for baking....Neil even used it for Yorkshire Puds! 

Now, onto the pulp.....
Because I strain my nut milk I'm left with a pot of nut pulp every morning. I quite like munching on a spoonful straight out the blender but I've also sprinkled it on yogourt  or used it to make thicker smoothies. A couple of morning ago I was feeling experimental and decided to try making crackers.  I mixed the pulp with a little coconut oil and spread the mixture across a silicone cookie sheet to about the thickness of typical "ryvita" style cracker. (I told you this was experimental :) I baked the sheet at 250f for about half an hour checking constantly. Half way through I cracked the sheet into smaller "crackers" so that I could turn them.....
.....and voila!


They were a bit more crumbly than I was hoping for but really tasty! Much more so than a boring Ryvita! I topped them with my version of chocolate spread - mashed banana and raw cacao and a slice of fresh banana "for colour" as my Mummy would say :)
Yum!


The crackers and choc spread were snaffled in a flash but I had lots of toasty nut flavoured crumbs left over and they were so good sprinkled over our salad for lunch. Waste not want not and all that!

Hope I have inspired you all to be creative with your nuts!
;)

Tuesday, November 01, 2011

Halloween, part 1.....

First we carved.....


Well, more accurately, Bel and I carved. Seb stuck a spoon in once and then declared that he didn't want to do this job in case he got pumpkin on his hand. I agreed that it would indeed be risky and he decided to be the boss instead. For most of the following two hours he sat on the table with his legs crossed and addressed me and Bel as "pumpkin makers". We had to call him "Boss".


Then we roasted......


For about an hour at 250F turning occasionally. I don't know if you have ever roasted pumpkin seeds before but they smell AH-MAZING!! It's almost like a yummy-cookies-baking kind of smell. Delifush! (as Seb would say).

Then we caramelized....


in a hot pan with about 1 1/2 tablespoons full of nut oil (the recipe used peanut but I only had cashew), and 2 tablespoons full of sugar (yes sugar, I'm sorry but it was halloween!).

Then we tossed.....

in another 3 tbspns of sugar (tut tut!), 1/4 tspn of cinnamon, 1/4 tspn of ginger, 1/4 tspn cumin and 1/4 tspn of cayenne pepper for the most yummy, snackalicious, sweet and spicy roasted pumpkin seeds. 

Then we ate.  Mmmmm mmmm!

EMAIL ADDRESSES


ralstne@gmail.com